Thursday, September 22, 2011

Lazy Bone .. Amba Khata (Mango etc)

Someone very very intelligent had once said.. "When the going gets tough.. the tough gets going" ! It essentially means, that when life throws you off the road.. you've gotta be very tough to get through its challenges..

Well, in my opinion.. everyone has their own way to get out of tough situations. We don't really need anyone to tell us how to manage our problems or how to get out of crappy situations.. somehow I feel.. we do approach people when we are lost.. but in the process of getting suggestions and consolations and what not... we eventually figure out our own way... do you guys agree??

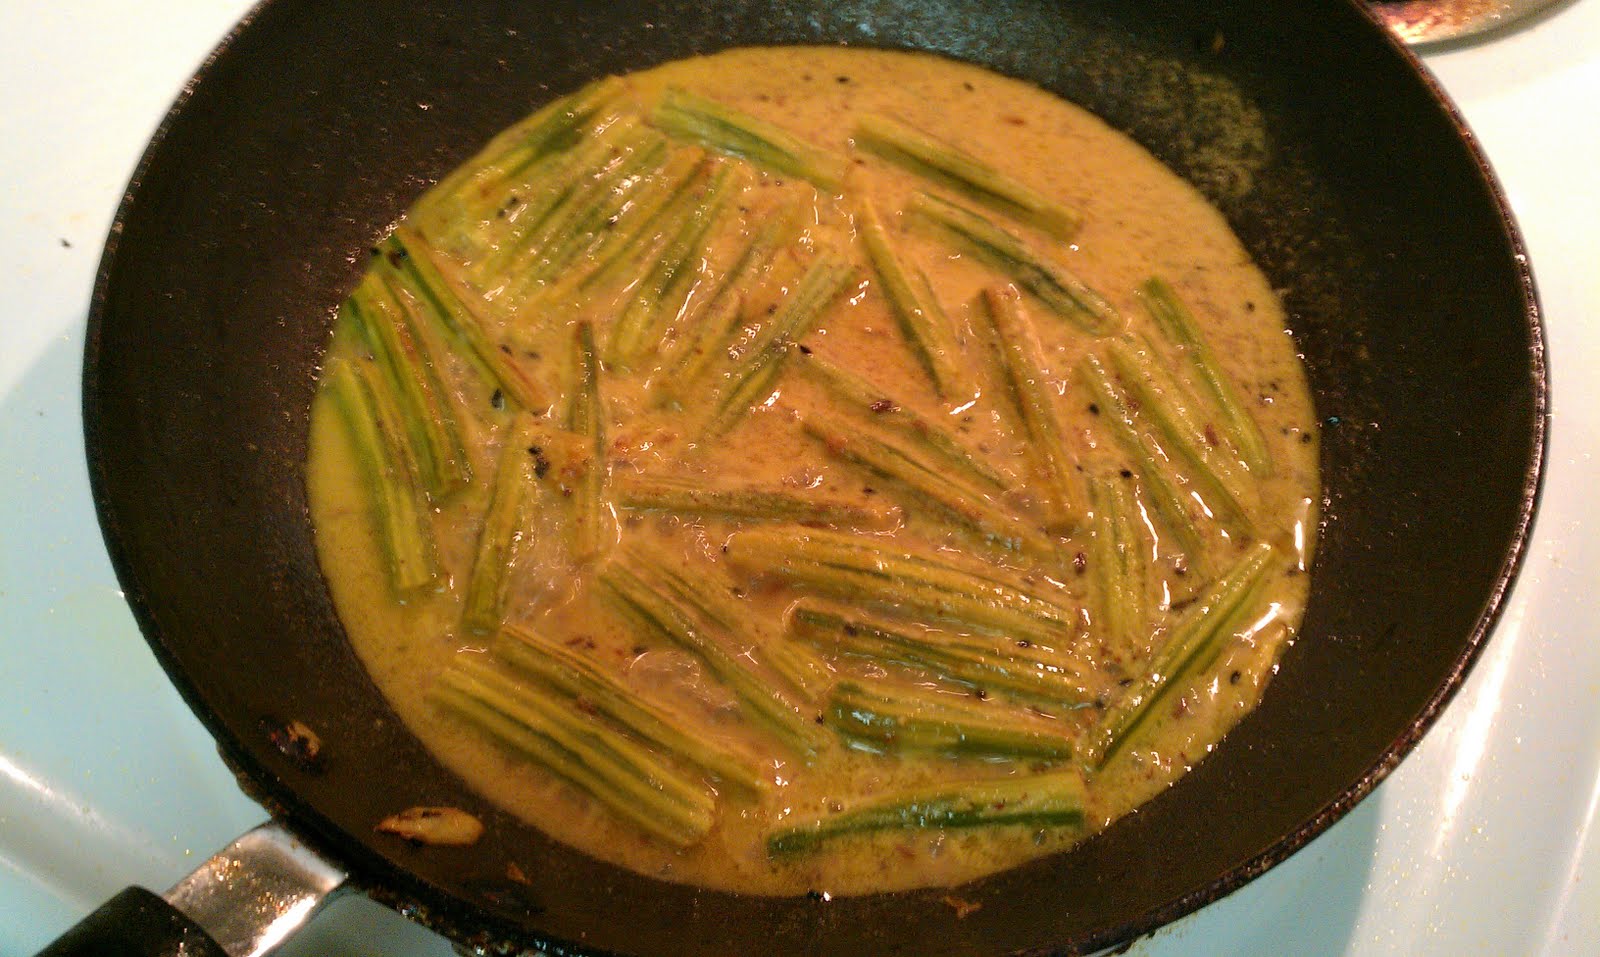
Anyways... why am I talking about all this?? Well.. I came across a very similar situation myself.. and I had no one to reach out to.. I wanted to make the very famous Odiya "Amba Khata" at my sister's place.. but the her spinster pad kitchen had no jaggery .. no chili-cumin powder.. and no curry leaves.. but she wanted "amba khata".. and it put me in a fix.. how am I going to make her smile.. I am not my mom..

Mom?? Well.. it was very very late.. and I could not call her.. so I started thinking myself.. and here's what I came up with.. the end product was delicious.. and everyone loved it !!


Ingredients:
  • 1 big green mango (cut into big cubes .. ensure that the seed in the middle is cut out of course)
  • 1 tea spoon cumin seeds
  • 1 tea spoon mustard seeds
  • 4 tbl spoon sugar
  • salt to taste
  • mustard oil
Process:
  • Heat oil in a flat pan (which will make it easy to saute' the big mango pieces)
  • When oil is hot, add 3 tbl spoons of sugar in it. Make sure it dissolves and does not turn dark brown.. just enough brown is good.
  • Now add cumin + mustard seeds now and let it splutter.
  • Now add the mango pieces and add a little salt (to taste)
  • Saute' until mango seems to be coated enough with the browned sugar
  • After 2-3 minutes, add 1/4 cup water and the rest of sugar
  • Let it all simmer away together. When the simmering is done the mangoes will be soft and juicy with sugar+salt mixture.
  • Sprinkle a wee bit of red chili powder and mix everything well.
This dish is usually a side dish in Odiya kitchen. We have it with rice+dal+subzee etc. Little girls like my sister, would just take it in a small bowl and use their fingers and tongue to take the juicy mango away !!

Enjoy this chatpata mango stuff.. have fun !!

Egg Plant .. what do I make of it ???

Egg Plants.. or brinjals.. I think.. are the most ignored vegetables.. but in the great Odiya kitchen, they are a life saver...

Of all things, if you are dull and too tired to make anything special.. a big bowl of "pakhala bhata" and "baigana" (egg plan or brinjal) anything will make it your day...

Picture this... hot summer afternoon.. the family is back from the morning school.. and the mom is way too sun-struck to cook anything desirably wonderful for them for the afternoon.... so then.. what does she do ??

No Fear.. "ignored" Egg-Plant is Here... a quick.. easy.. breezy.. egg-plan stir fry or hash will make a perfect side for the summer-saver "pakhala bhata" !! With some raw onions and green chillies this will make the greatest after-school meal for everyone at home... So eat and enjoy !!

Ingredients:
  • Egg plants (I used 2 long ones, you could use 4-5 round ones) cut into cubes (little longer)
  • 1 small white/red onion cut into long slices
  • 1 small tomato cut into long slices
  • 1 tea-spoon mustard seeds + 1 tea-spoon cumin seeds
  • 1/2 tea-spoon Red chili powder
  • 1/2 tea-spoon cumin+coriander powder
  • Wee bit turmeric powder
  • Mustard Oil and salt
Process:
  • Heat oil in a open pan and splutter cumin and mustard seeds
  • Add onions and fry till onion is softer.. but not very very brown. Slight light brown is good enough.
  • Then add the egg plants + the powders and mix well.

  • Cover and cook the egg-plants till they are soft.
  • When soft, add the tomatoes + salt
  • Mix well and keep it all on the stove till the tomato is all mushed up.. if its not, its fine too..

  • Ensure that the egg-plants are cooked well and coated good with the tomatoes.


As stated before.. this tastes good with "pakhala bhata" but you can also eat it with simple roti or plain paratha.. but the best is the best !!

Simple Chingudi Jhola ... remembering Mami..

Very recently, I started eating non-veg again after a break of 3 months or so. All my friends are very happy because I will not drag them to a vegetarian restaurant anymore for Friday lunch or dinner. But, I have not started eating everything non-veg. Right now its only eggs, fish and shrimp. Talking of shrimp, I made this easy curry that is the basic style Odiya gravy (used for almost every non-veg dish) and we had it for a Wednesday lunch. Of course, I was on vacation that Wednesday. Mami used to make this typically on weekends (or whenever Baba gets shrimp from the market) and we would slurp the gravy off of the plate and eat loads of rice with it. It was funny how a little non-veg on the plate would drive us to eating so much !!

Here goes the recipe for my friends who have some time remembered their mothers while cooking something similar..... It will take a little time but the end product is worth every minute spent !!


Ingredients:
  • 2 Lbs shrimp (peeled, deveined, its good to have just the tail on)
  • 1 large onion chopped fine
  • 4-5 green chillies
  • 1 medium tomato chopped fine
  • 2 potatoes peeled & cubed
  • 2 - 3 tbl spoons ginger-garlic paste
  • 1 tea spoon garam masala
  • 1 tea spoon cumin-coriander powder
  • 1/2 tea spoon red chili powder
  • 1/2 cup coconut milk
Process:
  • Wash the shrimp properly under running water, drain out water and marinate with salt + turmeric + wee bit of mustard oil and keep aside for 20-25 mins.
  • In the mean time, heat oil and fry the potatoes a little bit till they are brown on edges. You don't have to cook them fully. Just a 5 min. stir will do.
  • After you take off the potatoes, heat a little bit more oil and fry the shrimp. The shrimp will start turning pink and then reddish in color. That's your cue of a good shrimp fry.

  • Take the shrimp off the pan and add some more oil and heat well.
  • Splutter cumin seeds and then add green chillies + onions at a time.
  • When onions are browned up, add the ginger-garlic paste + all powders + little water and fry well till you don't smell raw masala.
  • Now add the tomatoes + salt and fry till tomatoes are all mushy.
  • When that is done, add the potatoes + salt and mix them in the masala and fry well. This is called "kassa" in Odiya meaning hard-core sauteing (I think)

  • When the potatoes are cooked in the masala (8-9 mins) add the shrimp and mix it well.
  • Leave the mix on the stove for a while (say 4-6 mins).

  • Now, add warm water + coconut milk to the mix and let the water boil vigorously.
  • When you have attained your choice of gravy thickness, sprinkle the coriander leaves and leave the gravy covered.
This shrimp curry goes best with while fluffy rice. Nothing else !! Enjoy cooking this for a Saturday or Sunday lunch and enjoy with the whole family. For the side, you may make some amba khata like I did or just some potato or egg-plan hash will do as well.

Tuesday, September 20, 2011

Egg Pulao ... When it's late.. and you still have time

Little Sis (Please do not go by little.. she's at least 1.5 feet taller than I am) : What's you planning on making for dinner?

Me (almost confident) : Egg Pulao.. biryani sort of thing..

Little Sis: Isn't it binary? .. like is it Egg Biryani or Egg Pulao ?

Me (confused) : Not very sure.. its not really a biryani method .. but it has biryani masala in it.. I saw it on youtube by Vah chef.. Don't need oven or anything..

Little Sis: Thats great.. I love youtube.. Did you see that new video from RA-One.. its funny..

Me (even more confused) : It has biryani in it?? Or Egg? The Vah chef is on that??

Little Sis: No.. just saying about the video on Youtube.. this site is a life saver when you r darn bored..

Me (smiling.. donno for what !!) : Ohh.. we are off the biryani topic.. I see.. we r talking about videos.. :)

Little Sis: Well.. yeah.. you are making it right.. it will be awesomer than the youtube guy.. and make a little more.. I want it for tomorrow's lunch also..

Me (very happy) : hmmmmm ... it will be edible.. so we will be fine..

Little Sis: Thats exactly what I meant !!!! (giggle.. giggle.. giggle...)

Can you believe this !! She was just kidding me around.. she is the sweetest of all sisters. I am sure.. every older sis thinks the same way about their little sisters.. but my case is different.. I learnt a lot from her.. staying calm is one of them (ironically).. and cooking for her smile is another...

Well.. the story is not very long.. I was on a vacation and staying with her.. she was working hard the whole day in her lab.. and I was passing time.. like always.. at home..

When she came back, we decided to go grocery shopping.. and so did we !!

We came back.. and I stared thinking about dinner.. I wanted something spicy.. and she wanted to eat non-veg... So I decided on Egg Pulao/Biryani (am yet to decide on the name .. mind you please) .. and thats when the whole conversation started.. and somehow.. I felt it was funny how we jumped from egg to Vah chef to youtube to RA-one to Boring times and back to egg in just a few lines... sister conversation is just so fast and funny !!

Well.. when I started pulling the ingredients.. I realized.. we had everything at home. before went grocery shopping.. we did that for the heck of it.. which is funnier.. coz I kept saying.. "need to do grocery.. I wanna make something nice tonight".. never realized that the trip to the store was not necessary.. I always had what I needed.. its just a matter of looking..

The above statement is so very true in real life as well.. you'll agree with me.. I am sure !!

Well.. here is what we need for the recipe (inspired from Vah chef's youtube video)
  • 7 eggs (6 hard-boiled and 1 raw)
  • 1 medium onion (white preferably) sliced into long thin slices
  • 4 slit green chillies (add more if your tongue allows so)
  • 4 table spoons ginger garlic paste (to be used separately)
  • 1 tea spoon red chili powder
  • 1 tea spoon cumin powder
  • 1 tea spoon coriander powder
  • 1 tea spoon corn starch
  • Whole masala (cloves + cinnamon stick + black pepper corns + cumin seeds + 2 bay leaves)
  • 3 table spoon biryani masala powder (any brand will do)
  • 1 cup chopped coriander leaves
  • 1 cup chopped mint leaves
  • 2 cups rice soaked in water for min. 30 minutes.
  • Oil as needed
  • Salt of course
The steps are here.. sorry could not take pictures.. will super update some when I make this again..
  • Pierce the hard boiled eggs with forks or make cuts with a knife.
  • Marinate with the following --> corn starch + chili powder + cumin powder + coriander powder + salt to taste + 1 raw egg + 1 table spoon ginger garlic paste.
  • Soak rice in water for at least 30 mins. Drain and keep aside after 30 mins.
  • Heat oil in a open faced heavy bottom pan
  • When oil's hot add the whole masala and let splutter
  • Then add onion and sprinkle a little bit of salt
  • Now add coriander leaves + mint leaves + green chillies and fry a bit
  • Then add 3 table spoons of ginger-garlic paste to the oil and fry up.
  • Now add the biryani masala to it.
  • Mix it all together and fry for a minute.
  • Now add 3 cups of water to the mix and let it boil
  • Once water starts boiling, add the rice and salt to taste. Cover up the pan
  • Let the rice be cooked slowly within the pan. Low heat needed.
  • Mean time, fry the marinated eggs in very little oil till they are brown on skin. Keep them in the frying pan.
  • When the rice is almost done, add the eggs into it and mix slowly.
  • Cover the whole pan and turn off the stove.
  • Garnish with coriander leaves..
We didn't have enough time to garnish after we started smelling the minty rice.
The smell was so good that me and my sister pounced on the pulao/biryani (still un-decided on the name).. tasted well with simple onion+tomato raita !!

When it comes to enjoying food.. its always nice to have family around... you would agree that.. family + simple dhaaba food is always better than lonely + 5-star food.

Happy Cooking !!

Wednesday, September 14, 2011

Kottu Paratha.. my first try !!

Sometimes, it just beats me, as to why is Indian cooking so time-taking and tedious. Well, no doubt its very very tasty... I'd give my life for it.. but if its a weekday and you are hungry and you have to make something at home because you are too tired to go out.. what would you do?????

What do I do?? I take a hot bath first... and try to think of one pot meals.. :)
The kottu paratha is one of my favorite one-pot meals (meaning where you don't need another side dish). It isn't Odiya...it's a Tamil dish. I have seen many variations in the preparation but when it came to making at home.. I had no idea what to put in it.. so I put whatever I could recollect .. I hope you try it and it comes out all nice for you too...


Ingredients here...
  • Frozen Malabar Paratha (diced up real nice) .. I'm not very proud of it, but I can't make malabar paratha at home yet.. come on.. people need time !!

  • 1 big juicy tomato chopped fine
  • 1 medium onion chopped fine
  • 1/2 green pepper chopped fine
  • 1/2 red pepper chopped fine
  • 1 carrot chopped fine
  • 6-7 curry leaves
  • 4 slit green chillies
  • 2 tea spoons chat masala
  • 1 tea spoon garam masala powder
  • Crushed Black Pepper
  • 2 eggs (skip if you are making veg.)
  • Oil and Salt
Process here...
  • Heat oil in a heavy bottom pan (preferably the ones which have a wider pane).
  • When oil's hot, add mustard seeds and let them splutter
  • Now add chopped onion, green chillies and curry leaves together
  • Fry a bit till onion looses color a little bit. Don't have to make it brown-brown
  • Now add tomatoes + little salt and let it cook so it becomes all mushy
  • Then add the peppers + carrots and fry them up nice and good.

  • Add garam masala powder + chat masala to the mixture.
  • Mix well.
  • When you think the veggies are almost done (little crunchy is fine), break the eggs on the veggies and scramble. Add salt as needed at this point for veggies and eggs.

  • Now add the chopped paratha and fry it all up together.
  • Sprinkle a little water using your fingers and cover the stuff up. This will help cook the paratha as well as keep it soft and nice.
  • Sprinkle crushed black pepper now.
  • When the paratha gets brownish you'd know its all coming together.

  • When done, add fresh coriander leaves on top and mix up just once or twice.
  • You may add a little bit of lemon juice if you like it tangy..
Once this was done, I was so overwhelmed by the colorful dish that I forgot why I was making faces at Indian cooking. By far.. Indian kitchen and cooking .. both are the best !!

Enjoy !!

Saturday, August 27, 2011

Posto Paneer ... a.k.a Khas-Khas Paneer


The sad story of working girls is that, we don't get enough time for our own friends... its family in the morning, work in the day, gym in the evening and family again at night...

Suddenly, all my girl friends started to feel the same way that I did.. so we decided to have a girls night in.. where no guys were invited, just us girls.. it was a potluck...

So emails started flowing from friends.. as to who would make what !! Once of my very good friends.. emailed me.. asking if I can make my "kass-kass-paneer"... I was like.. "I have no idea.. what that is".. and she goes.. am sure.. you made it somewhere... else how will I know..

But then, I was already assigned dessert.. so I kept quite.. but it still kept me inquisitive as to what is kass-kass-paneer.. so I started searching.. and while doing that.. I understood .. she meant.. "khas-khas" i.e. poppy seeds. or posto as we call it.. So in the next lunch party I made that and that friend of mine had also come.. and she goes.. "How did you make this.. you said.. you had nooooo idea !! ".. I smiled.. and said.. you said "kass-kass" .. which means saute' hard in Odiya.. and I got confused !! Its actually "khas-khas" meaning poppy seeds !!!

She smiles.. and says.. whatever it is . its yummy !!.. so here goes the recipe for all the paneer lovers out there...

Ingredients
  • 1 pack store bought paneer, cubed and sauteed in a little oil till brown
  • 4 tbl spoons posto (poppy seeds) dry ground in grinder
  • 1 medium onion
  • 1 medium tomato
  • 4-5 green chillies
  • 4-5 curry leaves
  • fresh coriander leaves for garnish
  • 1/2 cup whole milk or half-n-half or heavy cream
  • Palm full kasoori methi - crushed between your palms
  • 1" ginger (frozen is better.. you have to grate it)
  • Salt and oil of course

Process here:
  • Cube the paneer block and saute' in a little oil till the cubes is brown on skin but still soft. Do not over fry, else it will be all rubbery.

  • Heat oil in a kadhai till very hot. Splutter a little bit of cumin seeds.
  • Then add green chillies + onion + curry leaves together and fry till the onion is brownish in color.
  • Now, grate the ginger on top of the onions and fry for a minute.
  • Then add the diced tomatoes and salt and start frying up.
  • Once the tomatoes are mushy, add the green & red bell peppers + green peas to the masala and fry up nice and good.

  • Once the veggies are 25% done still crunchy.. add posto powder + heavy cream + 1/2 cup water and let it simmer. You may cover it as well for faster simmer.
  • Once the gravy starts simmering, add the paneer and reduce the gravy to the consistency that you need.

  • Sprinkle kasoori methi on top of this
  • Garnish with fresh & green coriander leaves and serve with roti or rice or whatever it is that you may like.

Enjoy !!

Dahi Bhindi ..or.. Bhindi Raita.. Many names.. Same True Taste and Coolness

Many of my friends are not from Odisha. When I was going through my posts, I thought ... hhhmmm... my non-odiya friends... will they like mustard paste and what not.. I should make something for them which they can relate to and still it should be kind of Odiya..

What better than "curd" (Yoghurt) can I remember my friends from Hyderabad and Bangalore. Every lunch.. every dinner.. I have to put out curd for sure. One of my very close friends said.. "We end all our meals with curd.. no matter what the weather is" !!

So I thought, what do we Odiyas make with curd.. Pakhala bhata yes.. but they won't know how to eat it.. :) Next.. any raita.. but even in Nothern India they make raita.. why should I make just raita for them.. next moment.. I looked at the bright green bhindi.. and it struck me.. "Of course.. Dahi Bhindi" .. So here it is.. ...


Here is what you need....simple ingredients
  • 10-12 small sized bhindis (okras) cut into 1/2" pieces.
  • 2 cups of thick curd (measure in 250 ml. cup).
  • 1 small red onion (has to be red please) longitudinally cut.
  • 1 teaspoon mustard seeds.
  • 1 teaspoon oil.
  • 5-6 curry leaves.
  • Salt to taste

First fry the bhindi pieces in a small amount of oil (uncovered) till they are soft. I call it dry fry. Well its actually not dry. We have to use a little oil.

Take the bhindi out and keep aside.

In the mean time, take curd, 1/2 cup of water, salt and add wee bit sugar and whip 'em all together.

Add the fried bhindi to this mixture. Let the bhindi seep some curd flavor.

Now, add a little oil to the same pan and let it heat up.

Add green chilies + mustard seeds and let the seeds splutter.
Now add onions and curry leaves together. This keeps the leaves greener and the aroma stays too.

Fry until the onions turn pink and translucent. Don't over fry to make it brown. Just pink is fine.

Transfer everything to the curd+bhindi mix. Mix 'em up real nice.

You don't have to keep it fridge if you are serving within 2-3 hours. If you want to keep it overnight, I'd say .. please do not. It does not taste good when cold and you can not even heat it because it has curd. So, you gotta make it fresh.. always !!

Enjoy with any pulao or biryani or serve it as a side dish with you delicious vegetarian lunch. Enjoy !!

Tuesday, August 23, 2011

Spicy Fried Idly ... a treat for the "yearning spicy" tummy

Some week days are just lonely and depressing.. just plain boring I'd say. I was not in a mood to do anything... anything at all.. Well, then I thought, people have to eat, right??

It was kind of cold outside due to clouds. The California weather is deceptive. You never know what's coming your way. Well anyways, the cold weather made my tummy yearn for some hot food... hot and spicy food.
Now, you see, that is the problem. No mood for serious cooking + severe craving for hot and spicy food = Innovation for lazy ones !!

So I somehow dragged myself out of the couch to the refrigerator. The first thing I saw was the Idly batter. It was like a cute little bulb that got lit in my brain.. imagine the ones that you see in cartoon movies.. it goes.... "tttiiinnnggg" !!

We have had spicy fried idly many times before in vegetarian south indian restaurants and this time, I decided to make my very fried idly. Simple yet filling. Colorful and spicy. And of course, it took no more than 7 mins for me to stand near the stove. Making idlis takes time, but you can watch TV then, you don't have to do anything. Just time it and you are as happy as I am !!

Here's what we need:
  • Around 10-12 Idlis, cooled & cut into small cubes.
  • 4 green chilies.
  • 1 medium tomato.
  • 1/2 medium onion.
  • 4-5 curry leaves.
  • 1/2 teaspoon red chili powder or 1 teaspoon paprika
  • 1/2 teaspoon garam masala.
  • 1 teaspoon urad daal.
  • 1/2 teaspoon mustard seeds + 1/2 teaspoon cumin seeds.
  • 1" ginger (frozen is best, then you can grate it very easily over the masala).
  • 1 green pepper + 1 red pepper (cut into small cubes -- Ask your husband to do this, after all they have to help too you know).
  • 1/2 cup of frozen green peas.
  • Little bit of turmeric + Salt to taste.
  • A palm full of coriander leaves for garnish.
Here goes the process....
  • Get idlis or make 'em at home. I made at home. Well you need the idlis to be cold. Cut them into small cubes and keep them aside.

  • Heat oil super hot and then add the idlis. Before you stir the idlis... sprinkle a wee bit of chili powder or paprika whatever you have on hand .. just for color. Then stir the idlis around.
  • Fry the idlis for a while till they start to look yellow-ish. Take them out and keep aside.

  • Now keep the pan hot enough, add some more oil.
  • To the hot oil, add some urad daal first.
  • When the lentil starts to brown add mustard seeds and cumin seeds. Let them crackle.
  • When the seeds crackle, add curry leaves, onions and the green chillies.
  • Fry it till the onion turns pink.

  • Now grate some ginger in, add turmeric powder, little bit of chilli powder and little bit of garam masala.
  • When the above masala is little fried, add the tomatoes and salt in.
  • Fry till the tomatoes are soft and start to vanish into the masala.

  • Now add the peppers and green peas. Cover and cook so that the veggies are all cooked yet crunchy.

  • When thats done, just add the idlis and mix well. Cover it for a while so that the masala seeps into the idli due to the steam.
  • To garnish, sprinkle fresh coriander leaves.

  • Serve with any of your favorite chutney. I love groundnut chutney, so I made that as well. Not that lazy after all huh !!
Enjoy your simple week night food. Its light yet will keep your stomach full till morning. If you use olive oil, its good & healthy too.

Sunday, July 31, 2011

Bhendi Besara (Bhindi in mustard paste)

Do you guys remember when was the last time when you laughed your heart out? Laughed like it was crazy and there was no tomorrow to laugh at? Well something like that happened to me the other day. I still do not remember the joke, but I was on a conference call and something happened and I started to laugh. First it was a small squeal which I am sure no one heard.. and then things got weirder and weirder and I started to laugh.. laugh and laugh.. and laugh.. :)

Well yes, sometimes these crazy things happen. You know, everyone should get that kind of a laugh once in a while. When your stomach hurts and your eyes water and you get all breathless due to the laughter..

Someone asked me "What did you eat.. you are laughing like a crazy person" !! I said, I had some of my mother's mustard okra. It sounds like some English food, but trust me this is pure Odiya side that I am talking about. Goes the best with white fluffy rice and best suits any weather.

Here is what you need:
  • Bhindi (okra) cut onto 1/2" pieces.
  • One small potato cut into 1/2" pieces.
  • 1 small tomato cut into small pieces.
  • 1/2 medium onion cut longitudinally.
  • 2-3 green chilies slit across length.
  • 6 teaspoons of mustard paste (2 Tbl-spoons mustard seeds + 4 Garlic cloves + 4 Green Chilis + little water)
  • 4 Tbl-spoons oil
  • 1 tea spoon panch phoran (if you don't have that, just add mustard and cumin seeds)

Here is how I did it....
  • Heat oil in a heave bottom pan until smoke comes off. Use mustard oil if you like or olive oil's good too.
  • Dry fry the okra and potatoes separately and keep aside.

  • In the same pan heat some more oil and when hot, add panch phoran + green chilies.
  • Then add the onions after like 5 seconds. Don't let the chilies brown.
  • When the onion is a little brownish, add the tomatoes and salt together.

  • Fry for a while till the tomatoes fix up well and become all mushy.


  • Now, add the okra and potatoes into the masala. Mix well. Do not turn too fast else the okra might break.
  • Let it alone for 2 more minutes.

  • Now add the mustard paste and a 1 cup water and mix well.
  • Cover and let the gravy simmer on low heat. Whatever has mustard paste in it, needs at least 5 mins simmering.
  • After 2 mins of simmering, add a piece of dry mango. This is the best ingredient. Makes the dish totally Odiya.


Garnish with coriander leaves and serve hot with white rice. It will just reach your mouth and then automatically vanish into the tummy. You won't even notice the time lag between intake and the magical vanishing act. Enjoy !!

Sunday, July 24, 2011

Mom Ishtyle Chicken Curry

Do you guys remember the famous Sundays of our school times? Yes my dear ones I am talking about the 7AM Rangoli program followed by 9AM Chandrakanta and then the 10AM Mahabharat...It was all so magical...and we used to always finish homework early so Baba will allow us to watch those Sunday programs...

Unlike today, we had only one day off in any week and that was Sunday....so we used to make good use of it.. finish all pending work.. press school uniforms.. and yeah.. run through the kitchen to get a nose-full of Mami's style chicken curry's "khushboo"...yummmyyyy...

The whole process starts with Baba going the market and getting fresh cut chicken. Yes, it is fresh cut chicken... which tastes the best with Mami's recipe.. then the masala getting ground in our very own old style "grinder".. It's not a blender.. and then the famous chicken curry cooking starts.... spreading the awesome aroma all around... :)

I don't have the exact measurements of all ingredients (else I will be the same cook as my Mommy), but they are close.. as stated by my sis !!

Chicken - 2.5 lbs
For the ground masala (to be wet ground)
2 inch ginger piece
8-10 garlic cloves (yes lots of garlic)
1 stick cinnamon
5 cardamoms
1 tea spoon jeera seeds
4 cloves
1 tea spoon coriander seeds (Do not worry, if you don't have them.. yo u can skip and add powder later)
2-3 red chillies
1/2 onion (red preferred)

Rest ingredients....
2 medium onions chopped small
2 small tomatoes (or 1 medium) chopped small
1-2 bay leaves
4 small potatoes (cubed and lightly fried in hot mustard oil)
Turmeric powder
Jeera powder
Dhaniya powder
Red Chilli powder
Garam masala powder
Coriander leaves chopped very small
1/2 spoon sugar
Salt to taste
Mustard oil for the marinade and cooking

Wash chicken nicely and drain off all water.
Marinate with salt + turmeric + a little mustard oil for 30mins.

Heat mustard oil until you see smoke coming off of the pan.
Add bay leaves + sugar + onions together.
Let the onions fry and become brown.
Add the wet masala (this is when the nice aroma starts... uncooked masala aroma of course)
Fry until the masala starts to look more brown.
Add tomatoes + salt + jeera powder + dhaniya powder + salt + garam masala powder + red chilli powder and mix well... You may add a little bit of water so that the masala does not burn before cooking.
Cook the masala well. The raw smell should go away and you should get a nice "kassa" masala smell.
Now add the chicken and fry for 15 mins covered (with 5 mins gap between stirs)
When the chicken is like 25% done, add the potatoes and mix well.

Now this is what my mom does... which I don't do always...
She transfers the whole thing into a pressure cooker and pressure cooks the chicken + potatoes in it.. after adding about 2 cups of water (We love the gravy)

The moment the first whistle goes .. phhiiisssshhhhh... We would get that awesome smell of the chicken curry...and go to the kitchen with some "bahana" like to drink water.. or to wash hands or something.. :)

It takes like 3 whistles or so.. for the curry to be super ready..
I usually cook it covered in the pan and it takes 20 mins more than mom.

When everyone's ready to eat, add the chopped coriander leaves on top and give the gravy a quick stir.

This curry has to be served with rice. Roti does not make any justice to this recipe. Well, it does if you save some for dinner. And this IS a lunch thing, when you can sit and watch TV and eat.. and then go for a walk because you'd be having a bubble tummy !!

Sorisha Sajana Chuin (Drumsticks in mustard paste)

You know, when we start to talk about "pakhala bhata" all we Odiyas go crazy...Yes.. we are crazy for food.. we are food "crazies" !!

The side dishes for "pakhala" are simple to make and yet delicious..one of them which I adore is drumsticks in mustard sauce...

Ohh, please do not think that it is some curry.. it is quite dry.. and yummy...

Since this takes mustard paste, mom used to make a lot and store in glass closed containers. Why make the paste again and again? Odiya kitchens use mustard paste for many many other things.. Drumsticks are just one teeny tiny part of that..

What she used:
6-7 medium sized drumsticks.
4 table spoons mustard seeds.
6 fat garlic cloves
4 green chillies
1/2 spoon panch phoran (If you don't have panch phoran, you can use only jeera and mustard seeds)

Mom would clean and cut the drumsticks very carefully. The hard scale should be scrapped off.

A wet paste would be made with mustard seeds, 4 garlic cloves and 4 green chillies. She adds water also to this paste so that its smooth like silk.. yes.. thats what she says.. and believe me, when its ready it looks like slight green silk..

Here's her process now:
Heat pan and add 1-2 spoons of mustard oil
Mean time, crush the rest garlic with a pestle.
Add panch phoran when oil is hot.
Then add the crushed garlic
Immediately add the drumsticks and fry for like a min or so.


Then add a little bit of water (like 2 spoons) and cover.
Leave the whole thing covered for 3-4 mins.
After 4 mins, remove cover and stir fry by adding turmeric and salt.
By this time, drumstick will be half cooked.
Now add 2 tbl spoons of mustard paste with 2tbl spoons of water.


Let it simmer away. Simmer until the water dries up. By the time water dries up, the drumsticks are fully cooked and ready to be served.


Enjoy your Odiya favorite food.


Kakharu Phoola Bhaja (Pan Seared Pumpkin Flower)


Summers always bring sweet memories back to me from where I come from.. from where I grew up...Its the vacation, I think which always has a deep down effect..No school.. no home work.. and yes the best part...the whole big family will stay in the same house in my village.. and we will all have so much fun..

In all this, the moms of the family, would be also rejoiced because they get to spend time with their "jethanis" and "devraanis". In my family, they are more like sisters. They gossip and they laugh and they cry together. A scene which I did not see in many other joint families.

Any hoo..how can I ever forget the food aspect of the vacations. Since mom does not have to go to work, she spends a lot of time in the kitchen thinking what special to make for lunch...thats when we all get all greedy. We keep running in and out of the kitchen, just to get a glance of what is cooking. They will scold us, asking us to stay out of the area where fire has been lit to start the one fine summer lunch...

Summers usually are very very hot, so we stick to "pakhala" (rice cooked and water added to that)...we add yoghurt to add coolness...What goes with that? Well.. almost everything I'd say.. but my favorites are more on the pan seared pumpkin flowers... they are ample in summer.. and its so easy to make them.. that we'd have them almost every day..

I am sharing my mom's way to do "Kakharu Phoola Bhaja" (Pan Seared Pumpkin Flower)

What she uses for the batter:
1 cup polished rice (arua or basmati) soaked in water for at least 30 mins.
1 inch ginger
4-5 cloves of garlic
4-5 green chillies
1/4th cup water
1/2 spoon red chilli powder
salt to taste

To start with, she'd first cut the stems off the flowers..No.. she won't throw them away.. she'd store them for later.. you'll see how smart she is !!

Wash the individual flowers under slow running water.


Since the flowers are very very delicate, she'd stuff one flower into another. Just like a cup into a cup.

Then wet grind everything under the batter section.

Now.. here's her battering station..
Place 1: flowers
Place 2: batter


She'd heat the pan so much that you can see the warm smoke coming off.. and yes.. it is mustard oil.. I was a freak to use PAM.. but this one tastes the best with mustard oil..

1. Pick the flower...
2. Dunk it in the batter...
3. Shake off excess liquid...
4. cchhheeewwwwnnn.... add to the pan..

Fry until the flower is golden brown on both side..


You know the stems she stored, she'd chop them real fine and add to the left out batter and make one big fat pancake with the mix...See I told you.. she will use them all..

How simple yet delicious. We would just grab one or two while they are on the hot plate..and run along.. who cares if mom is scolding.. she'd understand.. I am sure.. she would have done the same to her mom as well..

Enjoy your odiya favorite.

Mom's Chilli Mushroom On A Rainy Night

Who likes mushrooms?? The answer is everyone in my family. And who likes chilli mushrooms. The answer remains the same. Mom although being working, never compromised on anything for our taste buds. She did take care of our fat intake though. The chinese style chilli mushrooms that mom used to make, had very very less oil in it and they taste so perfect that you wont ever complain that "Mami, you dint focus enough on the recipe". Here's to those rainy nights and roti and chilli mushrooms from my Mom's rasoi.

How Mami did it...
Indian mushrooms are dirty with mud when bought. So, she used to peel them and put them in haldi water (Turmeric power mixed in water). This does not affect the mushroom flavor so dont worry about the turmeric. Wash the mushrooms nicely and make sure, there is no dirt. In America, you dont have to worry about it. Take the mushrooms, cut them into halves (make only halves not thirds or quarters) and run water on them in a meshed container.

Transfer the mushrooms to another container which is easy to hold by both hands. We have to shake it up and down later so make sure, you are able to hold the container with both hands good.

Add the following first and give the mushrooms and good shake.
  • Pepper powder
  • Chinese salt (also known as Ajinamoto. Note: use very little, elders say, its not good for health)
  • Lots of Paprika
  • Normal salt
  • Very little oil
After the first shake, add the following and use a spoon or spatula to mix.
  • Soy sauce
  • Lemon juice
  • Corn starch
Leave the mixture for 15 mins. Yes, my dear, this is not chicken, 15 mins are enough for the mushrooms.

Now, while the mixture sits on the counter, chop 4-5 fat cloves of garlic and make thin slices of onions. Green and red bell peppers were not readily available earlier, so Mom's mushrooms had onions only. You may put whatever you like, but don't complain if it does not taste like Mom's. Just kidding, please put peppers if you like them. There's no hard and fast rule in Mom's kitchen.

Heat 4 to 5 spoons in a flat bottomed non-stick pan. Mom used a normal kadhai, but non-stick is better so we can use lesser oil than she used to.

When the oil is super hot, put the mushrooms and let them brown on medium-high heat for at least 3-4 mins.


When they start turning reddish brown, you'd know the mushrooms are coming together and not mushing out. Thats the catch, she could make the mushrooms stay intact even without deep frying them.

After a high-heat-fry, cover and simmer the mushrooms for about 6 mins. This will leave water, but don't worry. We'll take care of the water.

Next, open the lid and fry again on medium-high-heat. The water will dry out and you can see oil separating out, just like, you'd see when you fry any indian masala. This ain't masala but it will leave oil. If you want, you may soak some in a tissue paper which reduces the oil quantity even more.

Once the mushrooms are done, take them out. Now, in the same super hot oil, put the garlic and onions "together". Fry and let the onions turn translucent.


Now add a little dark soy sauce, salt for the onions and any chilli garlic sauce (get the red colored ones they are real nice). Mom used a home made paste of red chillies and garlic which was spicy enough to take us through a chilly rainy night.

Do a little frying and then add the mushrooms. Fold the mushrooms and onions together and the chilli mushrooms are done. Frying this on low heat for about 3 mins is good enough.


The overall process takes no more than 20 or 25 mins, very very less oil and tastes good. If your family likes mushrooms like mine, try it. Its simple, its quick and above all, its mom's.